0 Cart
Added to Cart
    You have items in your cart
    You have 1 item in your cart
    Total
    Check Out Continue Shopping

    Articles

    How To Create Your Own Personalised Map!

    How To Create Your Own Personalised Map!

    One of the drawbacks of 'off-the-shelf' maps is that publishers have to decide what geographic area their maps cover - a decision usually based on covering the area with the minimum number of map sheets and keeping printing costs as low as possible.

    As a result you generally have to either 'make do' with a map that covers a larger area than you actually require or you have to purchase 2 or more maps to cover the entire area you need. Neither option is ideal.

    However, as a result of advances in online systems and printing technology, we can offer completely personalised maps at affordable prices. This guide shows you how to produce a map of exactly the area you want using our Maps Maker system and put your name on it!

    Selecting Your Map

    Once you know the type of map you want - for example a Postcode map - you can select this from the menu at the top of the Maps Maker page:


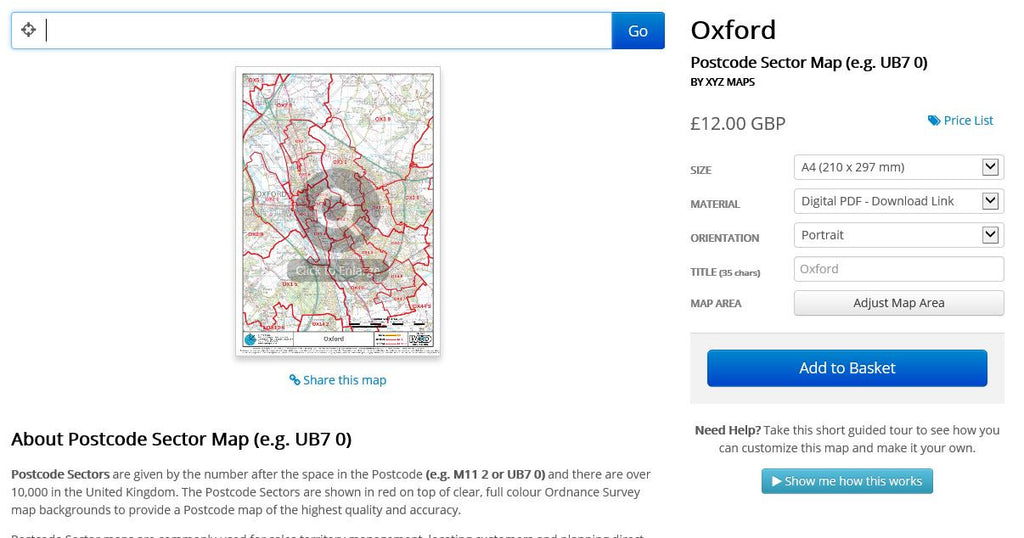
    Alternatively, if you want to see all available options for your location, simply type a place name in the search box on the home page:

    and click Search to see a list of maps for that area as shown below for Oxford:


    Customising Your Map

    Once you have selected the map you want, you will be presented with a screen similar to the one below:


     Custom Map Screen


    If you haven't already set a location, you can enter a place name or UK Postcode in the search box and click the 'Go' button to pick from a list of locations to centre your map on.

    This screen also allows you to customise your map by using the tools to the right of the preview image as described below. Please note that as you make changes to the map, the preview image will regenerate to reflect these changes. This may take a few seconds for each change so please be patient. 

    1. Size: This control allows you to select the size of the map you want to print. As you select each size the price of the map will adjust automatically.
    2. Material: This drop down list shows the various finishes available for your map - usually Paper or Plastic Coated (Encapsulated). We always recommend Plastic Coated for the finish as this will protect your map and ensure it lasts as long as possible. It also allows you to draw on the map with water-based marker pens without permanently marking it.
    3. Orientation: This allows you to change the orientation of the map between Portrait or Landscape. The print area shown on the map will adjust automatically - note that this option does not affect the price.
    4. Title: Entre your own title for the map (up to 35 characters). This is the perfect place to put your company or project name to make the map your own!
    5. Map Area: The 'Adjust Map Area' button takes you to our interactive map where you can modify the area the map covers so it is exactly as you require. (See below)

     Adjust Map Area

    When clicking the 'Adjust Map Area' button you will be presented with a screen similar to that shown below:


     Adjust Map Area


    The highlighted area shows the current area that will be displayed on your map. You can change the size of the area by clicking on the circular handle on the bottom right hand corner of the highlighted area and dragging it to enlarge or reduce the area.

    If you need to see a larger area than is currently viewable on screen, you can use the plus and minus symbols in the top left hand corner of the map to zoom in and out to get the exact area you need.

    Note you can also change the orientation of the map on this page by selecting portrait or landscape in the bottom left hand corner of the screen.

    Once you are happy that the highlighted area matches the area you want to see on your map you can click the 'Apply' button to the bottom right to apply the changes and return to the preview screen. 

    Preview Your Map

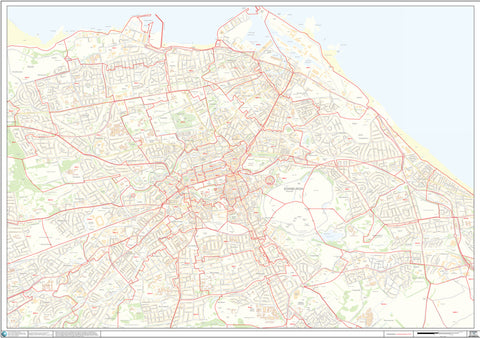
    On the 'Customising Your Map' screen, the preview map image is shown as below:


    Preview Map


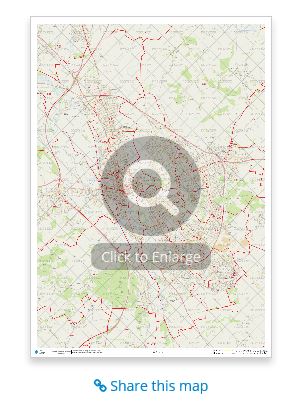
    This is obviously quite small and you will generally want a closer look at the map to ensure it covers the area you want and shows the expected level of detail.

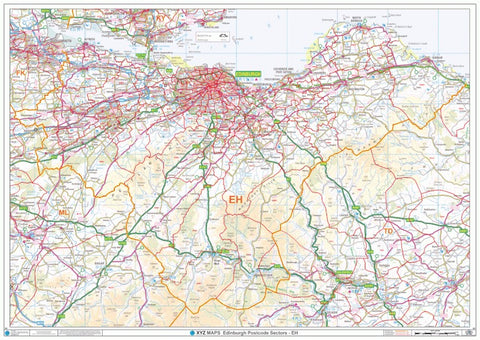
    To do this simply click on the image to enlarge it and you will be show a screen similar to that shown below.


     Enlarged Map Preview


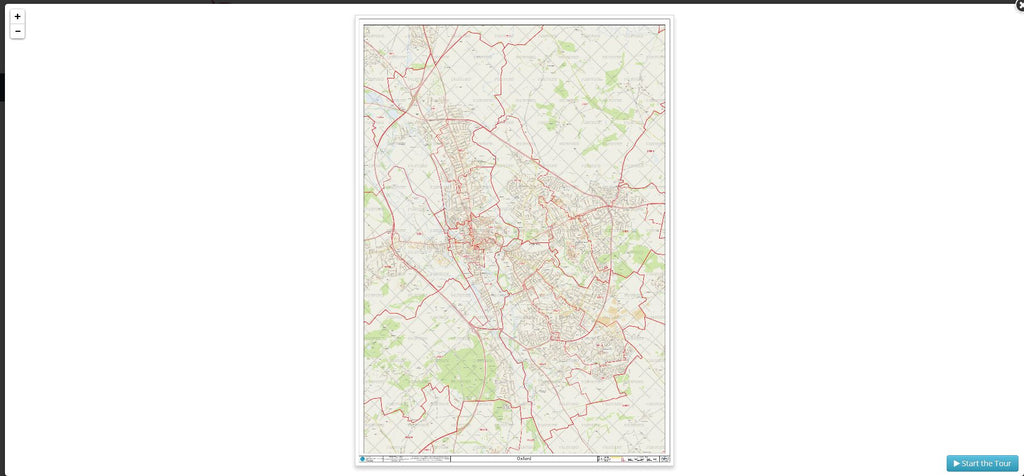
    To see a detailed view of what your map will actually show when printed, click the Plus sign in the top left of the map to zoom in further and see the actual detail as shown below.


    Map Sample Detail


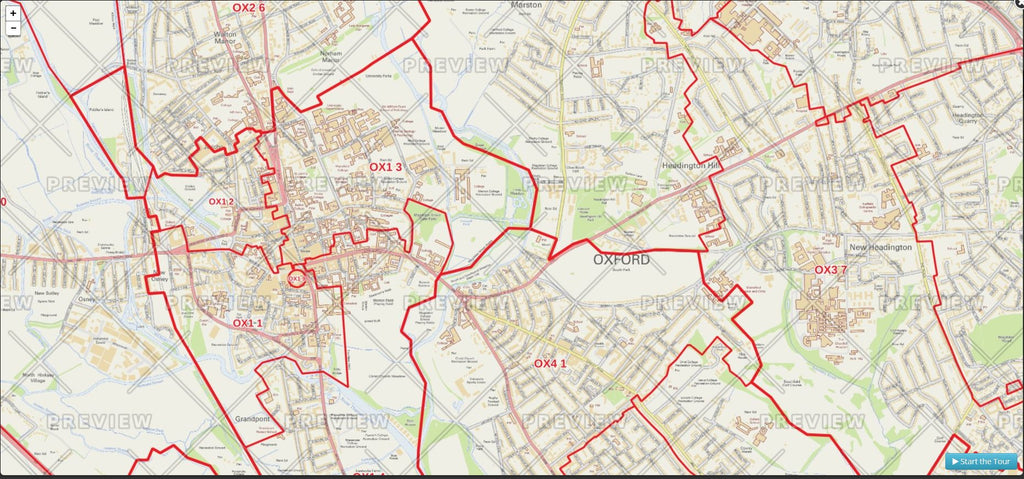
    You can also slide the map around by clicking on it and dragging with your mouse. Please remember that map images cannot be copied, printed or reproduced in any form and are purely for preview purposes only.

    Ordering Your Map

    Once you are happy with the map, you can now click the Add To Basket button and complete your order. Your map will then be professionally printed and sent to you. Delivery is usually 5 working days but please call if you have specific deadlines you need to meet.

    If you do need any help, just give us a call on 0844 808 2495 or send us a message >

    Using The Excel Data Form To View Postcode Records

    Due to recent versions of Excel allowing over 1 million records on a work sheet, we provide more Postcode data in this format than in any other including the latest release of the Postcode & Constituency lookup data. However, with around 2.5 million Postcode records spread across 3 work sheets, finding the specific Postcode you want and viewing the information associated with it may be frustrating.

    You can perform a quick search in Excel by hitting CTRL > F and entering a Postcode which will find the row you want, but then the information is displayed in columns across the page making it difficult to read.

    So this short tutorial shows how you can find a Postcode using Excel's built-in data form which also makes reading the information associated with the Postcode much easier.

    Setting Up The Built In Data Form

    Unfortunately the Data Form in Excel is usually hidden and you have to add it to your Quick Access Toolbar before you can use it. The following steps will show you how to do this but once it is done, the Data Form will be available whenever you use Excel in future.

    Click the little arrow at the top of Excel which is called Customise Quick Access Toolbar and click More Commands.

    Excel Customise Quick Access ToolbarWhen you click More Comments, you will see the dialogue box below:

    Excel Toolbar Options

    Click the left hand drop down list under Choose commands from and select the option highlighted in the image above: Commands Not in the Ribbon. The list box will then change to that shown below.

    Adding the Form command to the ribbon

    In the list to the left, find and click on the item call Form and then click the Add button in the middle. The box on the right should then contain the Form item as shown below.

    Form button added to ribbon

    When you click OK in the bottom right of the dialogue, you will return to Excel and will see the Form button in your Quick Access Toolbar at the top as highlighted in the image below.

    Data Form Added to Quick Access Toolbar

     Your Form button is now ready to use and the next steps will show you how!

    Using The Built In Data Form

    Now you have access to the Excel Data Form, the following steps show how to use it through illustration with our Postcode & Constituency Excel spreadsheet. In this spreadsheet we have all UK Postcodes and Parliamentary information spread across 3 work sheets (because each sheet is limited to approximately 1 million rows) as follows:

    1. AB-LN for all current Postcodes in the respective Postcode Areas.
    2. LS-ZE for all current Postcodes in the respective Postcode Areas.
    3. Retired for all Postcodes which are no longer in use by Royal Mail.

    For our example, we want to find the Parliamentary information for Postcode PH7 3RP and as the form only works on a sheet (rather than the entire workbook) we need to click on the LS-ZE tab which contains all the Postcodes for the PH Postcode Area.

    Once there, select any cell and then click your Form button in the Quick Access Toolbar to show the dialogue below.

    Excel Form Dialogue

    Note that all the data elements are greyed out. This is because the spread sheet is protected by default to avoid accidental deletion or over-writing of the information it contains.

    Click on the Criteria button to the right and you will see the dialogue below. Note that the data fields are now white allowing you to type into them. In the field for Postcode type PH7 3RP and hit Enter on your keyboard.

    Finding a Postcode using the Excel Form

    You will now see the form below displaying all the Parliamentary Constituency information associated with PH7 3RP in a nice and easy to read format.

    Parliamentary information for Postcode PH7 3RP

     We hope this quick introduction to the Excel Built-in Data Form proves to be useful but if you have any questions or suggestions we would love to hear from you.

    Finding The Best Edinburgh (EH) Postcode Area Maps

    Finding the perfect map of Edinburgh Postcodes can be difficult. Most maps are printed to cover a specific area at a scale and size which is designed to reduce the cost of printing rather than meet the needs of people who need them. And everybody needs something a little different whether that is a fast food outlet in the centre of Edinburgh needing a street map of their local area; an out of town car dealership needing a map of their area of influence; or a home services franchise needing a map of their individual franchise area covering Edinburgh and beyond.

    Buy online - choose from a range of superb Edinburgh Postcode Map options guaranteed to meet your specific requirements and budget from just £34.99, delivered to you door in 5 days.

    1 - Edinburgh City Centre Postcode Map

    Edinburgh City Centre Postcode Map

    This is a popular pre-printed Postcode map of Edinburgh city centre showing Postcode Sector boundaries covering from Davidson's Mains in the West to Portobello in the East and from the coast in the North to the University in the South. The map itself is a highly detailed Ordnance Survey street map showing key points of interest and street names. Prices for this large A0 map start at £34.99. Buy Now >

    2 - A Map Of The Entire Edinburgh EH Postcode Area

    EH Postcode Map

    This Postcode map of the East Central Belt of Scotland covers the entire EH Postcode Area and beyond using an Ordnance Survey 1:150,000 scale colour map showing main roads, town and village names. It covers an area from Smethwick in the West to Bromford in the East and from Witton in the North to Sparkhill in the South. This map is also A0 in size and is available from just £34.99. Buy Now >

    3 - Create Your Own Custom Edinburgh Postcode Map

    If the three maps above don't quite meet your requirement and you want a Postcode Map to cover a specific area of Edinburgh, then you can create your own custom made map using our online Maps Maker system.

    Custom Edinburgh Postcode Map

    With Maps Maker, you can tailor your Edinburgh Postcode map to your exact requirement. When you are happy, just place your order and we will despatch it straight to you. Maps Maker allows you to:

    • Define the exact area you want your map to cover
    • Change the size of the map you want to print from A4 to a huge 2A0 size.
    • Select whether you want the map printed in portrait or landscape orientation
    • Select whether you want a PDF, Paper or Plastic Coated map
    • Add your own title to the map such as your business name

    Get started by clicking here >


    Postcode & Address Updates In Numbers - February 2015

    As housing and business premises are built, demolished or renovated across the UK, Postcode geography and national address databases have to adapt to reflect these constant changes. Keeping this information up to date is an essential task that Royal Mail undertake on a continual basis and we use this information to ensure all of our products are regularly maintained.

    Read more

    A History Of The Postcode

    Postcode History

    Ever wondered how or why postcodes started? The following tale provides an overview of why and when the Postcode system was introduced.

    In the mid-19th century, central London postal districts were divided between East Central (EC) and West Central (WC); whilst the perimeter of inner London was split into N, NW, NE, S, SW, SE, W, and E. This first system of ten London postal districts was devised by Sir Rowland Hill and introduced in 1857 and 1858. S and NE were later dropped and are now used for Sheffield and Newcastle. The numbered subdivisions (W1, W2 etc) were a war-time measure and date from 1917. The 1917 subdivisions remain important, because they form the first part of the two-part modern postcode (so N1 1AA is an address in the old N1 district), and because they continue to be used by Londoners to refer to their districts.

    Automated Sorting

    In the late 1950's, the Post Office experimented with electromechanical sorting machines. These devices would present an envelope to an operator, who would press a button indicating which bin to sort the letter into. Postcodes were suggested to increase the efficiency of this process, by removing the need for the sorter to remember the correct sorting for as many places.

    Testing the System

    In January 1959 the Post Office analysed the results of a survey on public attitudes towards the use of postal codes. The next step would be choosing a town in which to experiment with coded addresses. The envisaged format was to be a six character alphanumeric code with three letters designating the geographical area and three numbers to identify the individual address. On 28 July Ernest Marples, the Postmaster General, announced that Norwich had been selected, and that each of the 150,000 private and business addresses would receive a code by October. Norwich had been selected as it already had eight automatic mail sorting machines in use.

    When this modern postcode system was introduced for London in 1960s, the numerals were added such that the areas nearest central London were allocated the number 1 (W1, SW1, etc.). Afterwards, numbers were allocated alphabetically, not by geography, and with complete disregard to the boundaries of London’s boroughs.

    National Roll Out

    In October 1965 it was confirmed that postal coding was to be extended to the rest of the country in the "next few years". On 1 May 1967 post codes were introduced in Croydon. The codes for central Croydon started with the letters CRO, and those of the surrounding post towns with CR2, CR3 and CR4. This was to be the beginning of a ten year plan, costing an estimated £24 million. Within two years it was expected that coding would be used in Aberdeen, Belfast, Brighton, Bristol, Bromley, Cardiff, Coventry, Manchester, Newcastle upon Tyne, Newport, Reading, Sheffield, Southampton and the western district of London. By 1967 codes had been introduced to Aberdeen, Southampton, Brighton and Derby. In 1970 codes were introduced to the Western and North West London areas. In December 1970 Christmas mail was franked with the message "Remember to use the Postcode", although codes were only used to sort mail in a handful of sorting offices.

    During 1971 occupants of addresses began to receive notification of their postcode. Asked in the House of Commons about the completion of the coding exercise, the Postmaster General, Sir John Eden stated it was expected to be completed during 1972.

    A Postcoded UK

    The scheme was finalised in 1974 when Norwich was completely re-coded but the scheme tested in Croydon was sufficiently close to the final design for it to be retained. Newport was originally allocated NPT, in a similar way to Norwich and Croydon, with the surrounding towns allocated NP1-NP8. This lasted into the mid 1980s when for operational reasons it was recoded.